Setting Up the Footer Content in the UUA WordPress Theme
Getting Started
If you are installing the UUA WordPress Theme for Congregations, ask questions here.
The footer, which appears at the bottom of every page, contains four areas, three of which are customizable (see demo). From left to right:
- The first (leftmost) area has the congregation’s address and contact information, with a link to directions. Be sure to fill this out, because it’s used in the Directions section at the top of every page, too.
- In the demo site, the second area has a picture and short bio of the congregation’s minister. This can easily be something else.
- In the demo site, the third area contains is a newsletter subscription sign up. This can easily be something else. See our guidance on the News pages to insure that your site is set up in accordance with your newsletter and privacy policies.
- The fourth (rightmost) area has the UUA’s logo with a link to UUA.org, plus the Welcoming Congregation graphics (for recognized Welcoming Congregations) and Green Sanctuary graphics (for recognized Green Sanctuaries.)
Below that, at the very bottom of the page, is the Footer Menu, a small row of text links.
To customize your footer, log in to your site as an administrator. Follow the steps below to change each of these areas.
First, Second, and Third Sections
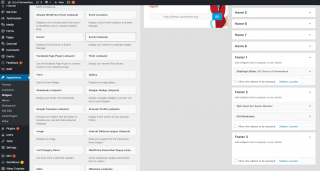
Choose Widgets to see a page about the available widgets and which widgets appear where. The page looks like this:

To configure where widgets appear, choose a location from the “Theme Sidebars” list at the right and then drag widgets into the area that appears. Scroll down the list to find the location (e.g., “Footer 1”) and then click the down arrow to its right to display its configuration.
Footer 1: Click the down arrow to the right of “Footer 1” and drag the “SiteOrigin Editor” widget from the “Available Widgets” column into the “Footer 1” area. Enter your congregation’s name as the title and its address, phone number, and email address in the text area. Click the Save button at the bottom of the “SiteOrigin Editor” box.
Footer 2 and Footer 3: Click the down arrow to the right of “Footer 2” or “Footer 3” to add a widget in each of these locations — or leave them blank. Options include:
- A UUA bookstore product: Choose the “UUA Bookstore” widget.
- A listing of recent news: Choose the “List Category Posts” widget and set it to display posts in the “News” category.
- A map showing the location of your congregation: Choose the “SiteEditor Google Maps” widget.
- An image: Choose the “Image” widget.
- Text: Choose the “Text” widget.
Fourth Section: Logos
- Choose Appearance > Customize form the Dashboard.
- Choose Footer Options to update the URLs that the LGBTQ Welcoming Congregation and Green Sanctuary logos link to. Choose URLs that go to your own Welcoming Congregation and Green Sancturary pages. If you are not a Welcoming Congregation, or if you are not a Green Sanctuary, leave the links blank. In that case, the logos will not display.
- Choose Menus > Footer Menu to customize the links that appear at the bottom of your page. You can customize the titles and the URLs.
Footer Menu
The footer menu appears at the bottom of every page. It’s small and unobtrusive and designed to be used for administrative links Terms of Use, Privacy Policy, and the login link you and your fellow editors use to log in and update the site. If you loaded the demo content, these links will go to the demo website. Replace those links to your own website pages.
Follow the instructions above to display the edit page for this menu.
Remove the custom links that came with the demo content, if they are there. Click the link in the Menu Structure list and click the Remove link.
Add links to your own pages by locating each page in the Pages list, clicking its checkbox, and clicking “Add to Menu”.
To add a link to the login page, add a custom link and enter the URL like http://yoursiteurl.com/wp-admin (replacing “yoursiteurl.com” with your congregation’s web address).