Leader Resource 5: Journal Making Instructions
Part of A Place of Wholeness
These instructions are used with permission from Jaymi Elford. Copyright 2008 Jaymi Elford. Essay originally published at D*I*Y Planner.
Please use the following book making instructions for Activity 3, Making a Journal for the Journey.
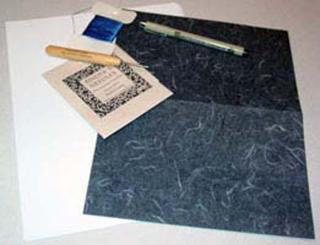
Supplies:
- 12 sheets of white unlined paper for each journal being made
- 1 sheet of heavy cover paper for each journal being made (this can be construction paper, thick handmade paper, or postcard weight paper)
- A bookbinding needle (1 needle per 3 or 4 participants)
- A bookbinding (or paper) awl (1 awl per 3 or 4 participants)
- Wax thread or book binding thread (at least 2.5 feet per participant)
Instructions:
Step 1: Fold a sheet of white unlined paper in half. If you want a smaller sized book, trim the paper down to the size you want and then fold it in half. You now have made one folio.
Step 2: Fold the rest of the sheets of paper in half to make 12 folios. You can fold the heavy cover-stock at this point as well.
Step 3: Open a folio slightly and then slide the remaining 11 folios into that one. Doing so should give you a stack of folios. This becomes the book's signature.
Step 4: Put your heavy cover stock over this folio, and now you have a book. Some of the guts of the paper will poke through your cover, so you can either trim the overhang so it matches the cover or leave it. It's all up to you and your style.
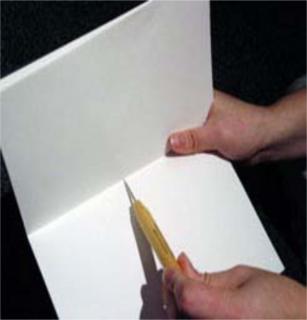
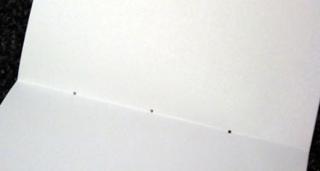
Step 5: Open the completed book. Using a pencil, mark a dot in the center of the fold.
Step 6: Now make two more dots, 2.25 inches up and down from the center dot on the fold. These will be where you punch the holes with an awl and string the thread through.
Step 7: Punch the awl through all 13 pieces of paper. If you twist the awl after it has gone all the way through, it widens the hole and smoothes it out. It's now time to sew the signature.
NOTE: If you have trouble punching holes through all 13 sheets at the same time, you may want to divide the sheets up into two piles and punch the holes in sets. Then re-stack the sheets together and push the awl through the three holes to smooth them out as a single signature.
Step 8: Measure out roughly 2.5 feet of waxed thread. Load up one of your book binding needles with the thread.
Step 9: You now have to make a choice of whether you want the leftover thread to hang on the outside or the inside of the book. If you are making a book for mostly decorative purposes, most artists choose to leave it on the outside. This decision effects whether or not you start sewing from the center of the book on the inside or on the outside. The following instructions are for a decorative book, so the leftovers will be on the outside.
Step 10: Take the needle and thread and push it through the center hole from the outside to the inside of the signature.
Step 11: Pull the needle and string through the hole, leaving a few inches behind. This becomes what you will knot the string with to make your book.
Step 12: Put the needle into the left inner hole and pull the thread tight.
Step 13: Pass the needle and thread through the opposite right hole on the outside of the cover.
Step 14: Put the needle through the center hole from the inside to the outside one more time and remove the needle. You are all done sewing.
Step 15: Pull both strings tight to help keep your book together.
Step 16: Now tie a knot (or 2 or 3 knots together for security) where the two strings meet. Depending on how long you want the excess thread to be, you may need a pair of scissors to trim it down.
You have now finished making a very simple book. If you liked this simple journal but want to spice it up a bit more, here are a few ideas for things you can add to your first book.
- Rip the edges of each folio so it has a rough edge to it. To do this, carefully rip about a centimeter of the page or wet the page roughly and tear small bits off to make it rough. This is very time consuming, but it does make a nice ripped edge.
- Print out a sheet of paper with a title for your book and then glue it onto the cover of it.
- Collage an assortment of pictures or scraps of colored paper to your book.
- Tie decorative strings in various styles off the outside of the book to give it an artsy flair.
- Braid the remaining binding and add beads to it.


