Leader Resource 2: Rainbow Banner Instructions
Part of A Place of Wholeness
Used with permission from Christine Michell.
Make several copies so that people doing different tasks can have a copy while working. Make sure you read through the entire set of directions before starting. This is a complicated multi-step process and you will want to make sure you understand every step. It is also highly recommended that if you do not have a lot of sewing and quilting experience, find someone in your church who does.
Materials
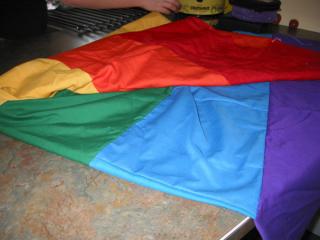
Fabric in 6 colors (with the following specifications)
- Use the colors of the pride rainbow flag (Red, Orange, Yellow, Green, Blue, and Purple)
- If a fabric looks like it's between two colors, choose one, and try to put it beside a more contrasting color (i.e. a golden fabric can look orange or yellow, so if you decide it's yellow, try to use it beside a more reddish orange)
- Fabric that is straight from a bolt (newly bought, or never used before) is easiest to use because it already has some straight edges; other fabric can be used, it simply takes a bit more thinking and a few more cuts
- If the banner looks like patchwork (with different shades and textures etc), that's totally fine! Remember this project is promoting diversity!!
- Ironing boards and steam irons (You will probably want more than one of each to speed along the process.)
- Extension cords
- Large tables to work on
- Cutting board with 1-inch grid (at least 20 x 30 inches)
- Rotary cutters with sharp blades
- Strong straight edge (carpenter square, quilting ruler or standard ruler. Regardless it should be at least 24 inches long)
- Serger(s) (If the banner is only going to be displayed inside a sewing machine will work. However, if the banner will be used outside and/or in any parade the serger will make for much stronger seems)
- Tweezers
- Sewing machine oil
- Extra needles
- Small brush
- Serger thread cones
- Tape
- Waste basket
- Bag to keep serger ribbons in
- Tape measure
Instructions
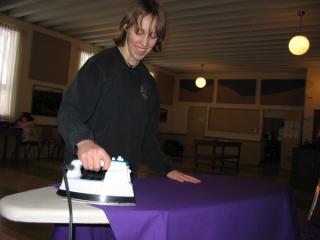
STEP 1: IRONING
- All pieces should be ironed before cutting, to make more accurate cuts and to make serging easier
- Iron the pieces flat - no folds
- In general, try to keep fabric off the floor as much as possible, especially if there's any dirt or water on the floor — these banners will not be easy to wash, so we need to keep them as clean as possible.
STEP 2: CUTTING
INSTRUCTIONS FOR CUTTING NEW CLOTH
- Start with a manageable length of fabric to work with (about 2 yards or less) — cut it to be manageable if necessary. This will make everything else easier. You can also do this before ironing.
- Fold in half lengthwise to bring the finished edges (selvages) together, and smoothing the fabric flat on the table. (2 layers of fabric at this point)
- Fold in half end to end, bringing the rough-cut ends together. (4 layers)
- Fold lengthwise again to make the width fit on the board. (8 layers)
- Square off ends with the straight-edge and rotary cutter. This is easy, using the grid on the cutting mat to line up the fabric, and then line up the straight edge along a grid-line across the fabric. Always try to line up two perpendicular edges along the grid to make sure the corners will be square. Take the guard off the rotary cutter and carefully press the cutter through the layers of fabric and along the straight-edge. You probably want a friend to help you hold down the straight-edge so it doesn't move while you're cutting.
- Undo last fold
- Fold fabric in half end to end again, bringing folded end to line up with the freshly-cut ends. (8 layers) The length of the fabric should now fit on the cutting board.
- If the selvages do not line up perfectly, you may wish to straighten the selvage edge by lining up most of the selvages along a grid line, and just cutting off the bits of the selvage that stick out.
- To cut the first 11-inch strip, line up the selvage edges with a line close to the side of the board. Use the straight edge and rotary cutter to cut parallel to, and 11 inches away from the selvage edges. Remove the resulting two finished strips to go to the serging stage.
- If there is at least an 11-inch (doubled) width left, then cut another 11 inches from the newly-cut edge, to give you two more strips for serging. If the fabric was 45 inches wide to start, this will be the case.
- If there is not 11 inches of folded fabric, then (to leave the least wastage) short strips need to be cut across the fabric instead. Use rotary cutter and straight edge repeatedly to cut as many 11-inch strips in the other direction as possible.
INSTRUCTIONS FOR USING OLD CLOTH
- Find the edge that appears to be the straightest. Line it up as closely as possible along one of the guiding lines on the cutting mat. Use the straight-edge and cut along the line. This edge should now be straight. This is similar to straightening the selvages as in Step 7 above.
- Line this new straight side up along a guideline, and square off the ends as described in Step 4 above.
- The rest of the procedure is the same as above.
STEP 3: SERGING - MAKING LONG STRIPS
1) Make sure to get instructions on the use of the serger before you begin. (Or, enlist the help of an expert!)
- Serge shorter strips of one colour together, end-to-end, to make a long strip
- Remember right sides together!
- Make long strips all approximately the same length before going on to the next step.
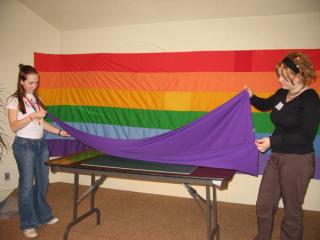
STEP 4: SERGING — MAKING A BANNER PANEL
- Serge the long sides of the strips together in rainbow sequence (R_O_Y_G_B_P) to make one long panel. Remember right sides (with no serger stitching showing) together! Each colour strip of the finished panel should be about 10 inches wide.
- Make the total seam width half an inch, including the width of the stitching plus the width of the 'ribbon' cut off by the serger. It can help to put a piece of tape on the stitching surface of the serger half an inch to the right of the left-hand needle location. As you feed the fabric into the serger, keep the unserged fabric edges together and lined up with this piece of tape.
- When the fabric has been ironed and cut with a rotary cutter, there will generally be no need to pin the edges together. You should be able to easily hold the edges flat together as you feed them into the serger.
- Once you have each strip attached, you may realize that not all strips were the same length. With a rotary cutter and a straight edge, cut off the end of the longer strips so the panel has all colours the same length. If the end you cut off is more than a couple of inches, it is probably worth it to keep that fabric and incorporate it into the next strip of that color.
NEXT STEPS
At this point you are done. If you have the interest and the time you can connect several of these banners together and make one really big banner as the Canadian youth did. Or, you can stick to your one piece of banner.